Tuesday, October 26, 2010

Halloween Decorating on NO BUDGET!!

OK...so this year, I really wanted to decorate my home for Halloween. I LOVE fall & Halloween is my favorite holiday (behind Christmas, of course) but I wanted something fresh & new. Halloween decor that wasn't to cheesy or scary or crafty. Tough one huh...
On top of all that, I had NO BUDGET to spend on decorating.
So to my computer I went to look for ideas. I found the most AD-OR-ABLE decore on a couple new blogs I stumbled across.
CLICK HERE: House of Smiths
CLICK HERE: eighteen25
These blogs are just SOOO creative and I LOVED the style. Right up my alley. So since I am really good at coping other peoples ideas, I took what I found and made them my own.
I covered my books that always sit out on my coffee table with white paper and then used vinyl lettering to put give the books "spooky" names. I replaced my usual cranberry colored candles with white ones that I always have on hand for entertaining then wrapped them in B&W scrapbook paper remnants. I also added some small vinyl Halloween pictures to a couple of the candles. I had the small pumpkin shaped candles on hand from hosting Thanksgiving dinner years ago. The only money spent on this entire display was $1 for the tiny skulls that I got from the dollar tree.


For the small table that sits between my two parson chairs, I REALLY wanted to find a small bird cage, paint it black & put a crow in it. But a bird cage was impossible to find in the fall. Trust me, I looked EVERYWHERE!! So instead I just bought a larger crow from Michael's. Best of all, it was 60% off, so I only paid $4.00 for it.

For my piano, every year, I put out cauldrons that I made, one for each of my boys. This year I added the "31-all hallows eve." It's just black poster board that I cut to fit inside a picture frame that I always have sitting on my piano. The lettering is, of course, vinyl. Best of all...FREE!!

 For my entry way table, I took the idea from "House of Smiths," and just printed off a small sign that I designed in my Microsoft that says "along came a spider" and framed it with a black frame I already had.


This was my ONLY "splurge" this year. I needed something cute to go atop my pie safe that is in my hall way. I've had the "BOO" candle for a couple years but needed something to finish the "moment." I found these cute silver ghosts at Hobby Lobby when I was there looking for something else. They were more than I wanted to spend...since I was trying not to spend anything. But I got them at 50% off. So for both, they were a whopping $16. But aren't they just sooooo cute!!
In my family room, I have one bookshelf area where I can decorate for the seasons. This year, this is where I displayed my spiders. I LOVE these spiders. I have been collecting them for a few years.
I finished off this area by again covering up my books with white paper and adding spooky titles to them. And added some small pumpkins to my ball collection on the bottom shelf. LOVE IT!!


Last but not least...the kitchen. Every year, I add the spiders to my kitchen chandelier. They are just spider rings that I've attached with thin metal wire and swirled by wrapping it around a large marker. I think its festive...and my boys LOVE IT!! I also ALWAYS add candy corns to my kitchen table centerpiece. It's an easy way to bring those fall colors into your table.

I found the small bat plates for my fruit stand in UT over the summer at a boutique and got them for like $2 each.
The plates on my hanging plate rack...the back ones were from Target for $2 each and the front ones are just extra white plates I collected over the years from Christmas cookies. I added the cute Halloween silhouettes in vinyl.
All in all, I spent under $30 total for EVERYTHING and have Halloween touched through out my entire home. Not bad I say, not bad at all!! Yeah Me!!

Friday, August 13, 2010

Back to School Gifts...

I have NEVER done "Back to School" gifts before for my boys teachers. But I think that was because between Davis' 2 preschools, he had 5 teachers & 1 speech therapist I would have to buy for...that is just WAY to much. But this year, we only have 3 teachers.
So when my friend, CADI, called me and told me about these adorable apples (Bath & Body Works) that were filled with hand sanitizer...I was all over it!!
I went and picked up some apples, then came home and personalized them with the teachers names in vinyl on the front. Then I added a "to-from" tag to the adorable B&BW tag...and Wha-Lah...a cute, inexpensive back to school present for teachers. 

Tuesday, July 27, 2010

Indiana Jones Birthday

 This year Easton turns 8, which is a big birthday at our house. So he got to choose whatever birthday theme that he wanted for his party this year. I don't know why but he chose "Indiana Jones."
So...we started with the invitations. I made them pretty simple by making a tri-fold invite out of card stock. Inside the invite we had a map, like the map in the Indiana Jones movies, with a dotted line that lead to our home. The left side of the invite had the party theme & the right side had all the party details. On the front of the invite I put a small label in the center to close it that read "OPEN-Adventure Ahead."
I then wrapped the invite a few times around in some twine and tied on a tag with the child's name. Best part about these invites is they were made with stuff that I already had...which made them FREE!! 
Onto the decorations...
I decorated our kitchen nook all "Indiana Jones-ish" with crates, boxes & barrels that were all labeled in vinyl letters. Some read "Fragile-this end up" others read "Caution-Explosives." I put up black vinyl table clothes in the background (over my windows) to make it cave-like. I added creepy clothes to the backdrop & table clothes. Then I served the food off of old wooden plates & barrels. I topped the decor off with a choc. brown canopy that I hung over the entire table.
The boys LOVED IT!! I knew I had done a good job when my oldest son told me that this party looked just like the movies.
I had the boys eat outside since we were doing all our games outside & then swimming. I put up a table and covered it with black tablecloths & creepy clothes. I surrounded the patio with big boxes that also had misc. labels on them. Then I placed small tiki torches around the patio in Terra-cotta pots (I didn't light them for safety, but just having them around was a cool effect). Lastly, I hung white and spider paper lanterns over the table and then they glowed while they ate dinner (once the sun went down). I had ALL of these decorations in my Halloween bins so I didn't have to buy one single thing to decorate. The only thing I didn't have were the boxes, which I just borrowed from some friends.

Next....GAMES
As soon as the guests arrived, we sent them out to our sandbox for an "Archaeological Dig." We gave each boy a camouflage nap sack (oriental trading-12 for $10) that they got to fill with whatever buried treasure they dug up in the sand. The boys found gold (bubblegum coins from Oriental Trading 100 for $5), bones (old Halloween decorations that I had), magnifying glasses (Dollar Tree 6 for $1), snakes (Oriental Trading Co. 56 for $6.00) & squirt guns (Party City Clearance 8 for .50). Not only did they have fun outside digging but the nap sack doubled as their goody bag that they got to take home. 
The second game that we played was a blow dart war. I got straws (the larger ones from Sonic) & Q-tips that I had soaked in water. The boys got to blow the darts that they had at each other. They LOVED IT!! So simple but they had a blast trying to get    each other with their blow darts. (I had all these supplies at home...which made this game TOTALLY FREE) 

After we finished that game...we gave each of the boys a "Poison Anecdote" that they had to take quickly to rid themselves of the poison that they had gotten by getting hit with the blow darts. The anecdote were just different colored green M&M's a shower I  in a medicine bottle from Walgreen's.
(Again, had the M&M's from a shower I did and Walgreen's gave me the medicine bottles for FREE...so this little favor was no cost). The boys thought that the bottles of "Poison Anecdote" were pretty cool and the M&M's made a good snack between games.

Our last game  was a grenade fight...which were really small grenade water balloons that I found at Walmart for $1.50. I put all the grenades in a metal bucket labeled "Explosives." The boys had a great time cooling off in the heat with the water balloon fight.
Then the boys took a quick swim while I prepped the food...

GROSS-GRUB...(or food) 
I think my favorite part was coming up with food that we could mimic as gross-out grub. I wanted it to be food that they would recognize, so they would actually eat it but be able to give each item a gross name.
The boys ate boiled worms (hot dogs cut length wise & then boiled so they would curl), dried mosquito wings (potato chips) gooey bugs (gummy bugs), brains served out of skulls (strawberry jello with real strawberry's in it for texture & made with sour cream to give it a pinkish color) & jungle juice for drinks
(fruit punch that I poured into water bottles).

The boys finished the evening by watching the first Indiana Jones movie. This really was my favorite party for my boys that I have ever done. It was inexpensive to do because I had a lot of the supplies that I needed for it already. Plus it was the perfect party to have for boys...They all had a FAB-U-LOUS time!!!

Wednesday, June 23, 2010

Patriarchal Blessing Handouts

Sunday I had a lesson on Patriarchal Blessings for the Mia Maids. I found this adorable idea on Sugardoodle.net of how to start the lesson (LOVE THAT SITE!!).
To start the lesson I had all my Mia Maids take off their shoes and put them in a big basket. I then had the girls close their eyes and had each one of them pull out 2 shoes from the basket. It was hilarious. Some of them got shoes that were to big or small, some of them had 2 left shoes or 2 rights, & none of the girls had a matching pair. I made the girls TRY to put on the shoes that they chose and then related this to a patriarchal blessing...how each blessing is made to fit ONLY US. The girls thought it was a fun activity and it kept their attention for the remainder of the lesson. I gave them a small flip-flop key chain to go with the activity at the beginning of the lesson.

Spa Night

Last Wednesday, my Mia Maids wanted to do a spa night for our mutual activity. It was so fun!! All the girls brought supplies to share: fingernail polish, nail polish remover & other various items. I set up our activity in 3 stations. We had a table for manicures, a table for facials & and a couple chairs with foot baths with bath salts for pedicures. I also brought a CD player with piano music and played it while we had our activity...just like the music you'd hear at a spa.  
I am a little weird about sharing nail supplies so I made a spa bag for each of the girls. Each of the bags had everything that she'd need for the evening. I found small mani-pedi pouches at the dollar store filled with all toe separators, fingernail cutters, fingernail file, cuticle stick, & nail file. They came in really fun colors too!!
For the facials, I put in a face cleansing cloth (for them to wash their face before facial), a sponge brush (for them to apply facial masks), 2 cucumbers for their eyes, washcloth to clean their face after facial (found 2 for $1). I put all the items into a lunch sack that matched the mani/pedi pouches. The whole "spa bag" only cost me $1.50 a girl. The girls LOVED them!! It made the night even more fun that they had all their own supplies, plus a goodie bag they got to take home.

Friday, June 11, 2010

An excuse to Entertain...

As most of you know, I have been blessed with 4 boys. Which does not give me very many opportunities to set a fun, girly, table scape.
Last night we had a dinner as our YW board. We were welcoming 3 new women who were just called to serve with us as well and say goodbye to Chalece, the YW secretary, who is moving next week.
So we celebrated with a "fondue frenzy" dinner. I set the table with my black & white toppers (which it seems are becoming a staple anytime I entertain). Then used my white dinner wear for each course. We used the small dessert sized plates for appetizers, (cheese course), our bowls for our salad course & then the large dinner plates for our dessert course (chocolate fountain). The dinner was de-lish!! Thanks to everyone for bringing items to dip. 

I put simple lemons in my milk glass bowl as a centerpiece and yellow roses down the  middle of the table. My favorite part of the dinner were the adorable yellow and white napkins, which I found at target 2 for $1, and the water goblets, which I monogrammed with each girls first name initial and used as a place card as well as there drink & a favor for each person to take home.
It was so fun to get together, eat great food and learn more about each other. It was also fun getting to set a table that girls would appreciate!! Thanks for the great evening girls!!

Tuesday, June 8, 2010

Fun & Easy Birthday Gesture

Years and years ago, when I was in YW, I can specifically remember those leaders who personally remembered & recognized my birthday. I know that is weird but honestly, if you are with these girls 2 x a week for 2 years, it's nice to take them a little token on their birthday. We do recognize our YW the Sunday before or after there birthday during the opening exercises of YW but I wanted to do something small for each of them that I could deliver to them at home on their birthday.
Well, the other day I was at the dollar store for something else...(what else is new...I'm always at the dollar store for something) and I came across these cute little purses. I know they are cheap BUT they are perfect for the YW to use as scripture bags or make up bags when they go to camp. Anyway, I picked them up for each of my girls that have a birthday in the next year. I fill it with whatever their favorite snack is and deliver it to them at their house on their birthday. It's a very small token but I think it's kind of fun.

Sunday, May 23, 2010

Personal Progress Presents

Until very recently, I was the Personal Progress Advisor in our ward. I LOVED THIS CALLING!!! One of my favorites. Each month, on the second Sunday, I would give a small 2 minute lesson to introduce that months PP value & it's importance. Then at the end of each month, the YW who completed a PP experience in that months value, got a small prize from me.
Every month I had a hard time coming up with something fun and creative to reach the YW. So I am posting what I did for each value for those of you who may need a little creative help if you're in a similar calling.
FAITH-
LESSON:"Let your light so shine & trust in the Lord."
PRIZE: A small white candle with 'FAITH' written in vinyl on the front.
DIVINE NATURE-LESSON: "Each of us is the daughter of a Heavenly King. We are daughters of God. Which means some day, if we live worthy we will become Queens."
PRIZE: I made each of the girls a small key chain with a crown charm on it and tied it with a blue ribbon.
INDIVIDUAL WORTH-
LESSON:I gave the analogy by using money. First I showed the girls a crisp clean dollar bill and asked them how many of them wanted that dollar. Of course, each of them raised their hands. I then wadded up that dollar bill, smashed it, and stepped on it. Trying to make the dollar less desirable. I then again asked the YW who wanted that dollar bill. And again, all the girls raised their hands. I related the dollar to the YW that even though some of us may look pretty and crisp and others of us may look a little worn and tattered, all of us have value & individual worth.
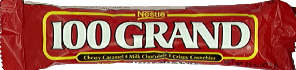
PRIZE: 100 grand candy bars...which went with the lesson but are also in a red wrapper.
KNOWLEDGE-
LESSON: I related a story about my Mom when she was diagnosed with cancer. How when she was first diagnosed, I was scared. But as I studied about the cancer and learned more about how she would be treated, the more comfort I felt. The more knowledge I had the more confident I was with the situation.
PRIZE: I beaded each of the girls a book mark for their scriptures with green beads.
CHOICE & ACCOUNTABILITY-
LESSON: Every choice has a consequence. You reap what you sew.
PRIZE: A packet of seeds OR you could give them a flower for their hair.

GOOD WORKS-
LESSON: This was around the holidays so I gave each of the YW the challenge to serve somebody that they may not know well or better yet someone they may not like.
PRIZE:I bought each of them a pair of mittens (since you serve with your hands) and tied them up with a yellow ribbon.
INTEGRITY-
LESSON: I can't remember...it was in the midst of LDS prom, so I'm drawing a blank.
PRIZE: I found purple pedicure kits in the Target dollar section & added a tiny bottle of purple nail polish. The girls LOVED these.
VIRTUE-
LESSON: I gave the girls the definition of the word "virtue." I also talked about why virtue was recently added to the values.
PRIZE: I wrapped up 3-4 pack of smarties and tied them with a gold ribbon. I had a little label that said "You're a 'SMARTIE' for doing your PP."

Dynamic Diaper Cakes

One of my favorite gifts to make for a baby shower is a diaper cake. They are just so darn cute. Some people fill them with baby items. However, on my diaper cakes...I think less is more. I like just the diapers wrapped with layers of cute ribbon and then something attached to the front.
This is the very first one that I ever made. Here is one that I made for my great friend Rachel for an "impromptu" baby shower we threw here before the birth of here baby.

Lime-Time Baby Shower

A girl in our ward that I visiting teach, just adopted her second little boy...who is just precious. I was lucky enough to help host her baby shower. We did all the decorations in shades of lime greens, black & white. It was so fun, because it's been forever since I've hosted a baby shower.
I decorated the front door by adding lime green berries to my wreath on the front door.Making diaper cakes for the serving table centerpiece is my favorite. Such a cute, classy addition to a baby shower. With this one, I added the baby's first initial as the cake topper. My friend Emily helped by making these adorable black & white tissue paper pom-poms. I wish I could take credit but I tried & tried to make them and they would NOT turn out. Emily SAVED me!! I made a couple of cute custom banners out of scrap book paper in the shower colors. I also made one out of these ADORABLE green onesies that I found at the Dollar Tree.Here is a look at the green candy table we put together for the shower guests to take home as a favor. I found all of the green candy at Wal-mart or Target. I borrow the apothecary jars from some friends and then added the ribbon and flowers to them to dress them up. These are the cute buckets I found for the guest to fill with candy. Of course from The Dollar Tree. They were 3 for $1. Then my friend Cadi made the adorable "Thank you" label and tied it to each bucket.Here is a full view. I got the cute green lanterns at the Dollar Tree as well.